22 September 2017
4 Comments
Posted in News
Caring for Your Printer
The LabelWriter printer is designed to give you long and trouble-free service, while requiring very little maintenance. You will get the best possible performance from your LabelWriter printer if you follow the setup instructions that appear in Getting Started on page 10, and the cleaning procedures described in this section.
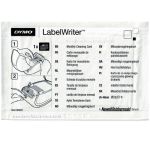
To keep your LabelWriter printer working properly, you should clean it from time to time. Dusting the outside of the printer occasionally will help keep foreign matter from getting inside the printer. However, it is still a good idea to periodically perform some basic interior maintenance, such as cleaning the label path with a LabelWriter cleaning card (available from the Dymo Shop).
The first time you connect to the LabelWriter Wireless printer, a Quick Setup wizard guides you through the connection process. You can re-run this Quick Setup wizard at any time from the menu to connect to a different network. You can also skip the Quick Setup wizard and configure the printer for a network.
Determine the wireless connection method to use to connect the printer to your wireless network. Refer to the documentation that came with your router or access point to determine the connection methods supported.
You can quickly connect the printer to your wireless network in several ways:
using the Wireless Protected Setup (WPS) button
using the Quick Setup wizard in the LabelWriter Web Configuration utility installed on the printer
Some router models support WPS but require a pin code.
To connect using a WPS pin code
Log in to the Web Configuration utility. See Accessing the Web Configuration Utility on page 15.
From the menu, click WPS.
Click Get pin code. A unique 8-digit pin code displays, the wireless status light will blink, and a two minute count down begins showing the time you have to connect the printer to your router.
Enter the pin code in your routers settings within the time left to connect. Refer to your routers documentation for where to enter the pin code.
Your label printer works with DYMO Label v.8 software to make designing and printing labels easy. You can also print labels directly from the desktop with QuickPrint, and from Microsoft Word, Excel, Outlook, ACT! (US only), and QuickBooks (US only) with DYMO Label Add-ins. The Add-ins are automatically installed when you install DYMO Label v.8 software if you have the applications above installed on your computer. See the DYMO Label v.8 online Help or Software User Guide for more information on using these features.
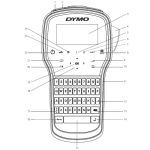
Become familiar with the location of the feature and function keys on your label maker. Refer to Figure 1. The following sections describe each feature in detail.

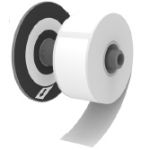
In the original packaging, the shelf life for LabelWriter labels is 18 months. When labels are used for short-term applications (envelopes, packages, and so on), fading is not a problem. When labels are used to label files in a file cabinet, fading is very gradual over many years. Labels applied to the edge of a notebook that is then placed on a shelf in the sun will show signs of fading within a few months.
Follow the instructions in this section to set up your label printer to print from your computer. To get started you will:
Connect the power.
Load a label roll.
Connect the printer to your wireless network.
Install the software you will use to print labels.
Add the printer to the software on either your computer or mobile device.
.jpg)
.jpg)
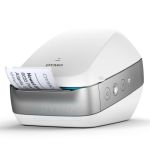
(New - Wireless Label Printer)

.jpg)