Dymo PnP Wireless Part 3 - Using the Dymo Plug and Play Built-in Software
14 June 2013
Printing Labels with the Built-In Software
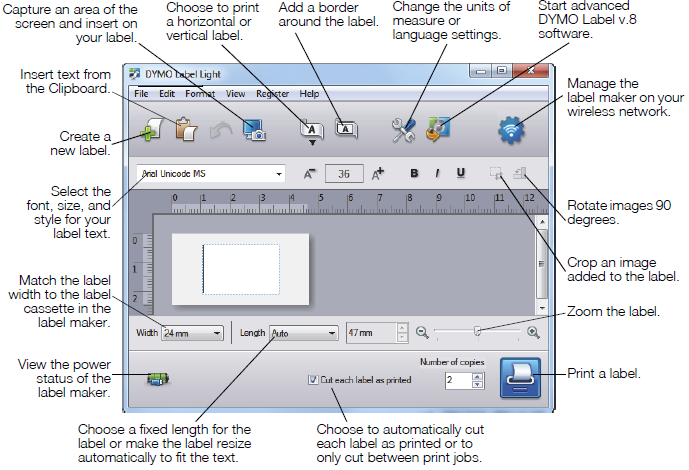
The following diagram shows some of the features available in the software for the Dymo Plug and Play Wireless printer.
To print your first label:
- Click once on the label in the Edit area and type some text.
- Click the print button to print the label.
To capture and insert an image from your desktop:
- Click the capture button on the toolbar.
- Drag the cursor to draw a selection box around the area to capture. The selected area is inserted into your label.
To take advantage of more advanced formatting features, click the download button in the built-in software to download and install DYMO Label™ v.8.5 or later.
Also in this series:
Part 1 "Installing your Dymo Plug and Play Label Printer"
Part 2 "Configuring your Dymo Plug and Play for Wireless Networking"
.jpg)
.jpg)

.jpg)