How to create a new label with the free Dymo LabelWriter software
In our last "how to" post we explained how to install the free Dymo Label Software that comes free with Dymo's LabelWriter series of label printers. In this post we start by creating a new label, and looking at some basic features.
So first, start up the software. You should be looking at the label tab, with a list of the available label sizes -
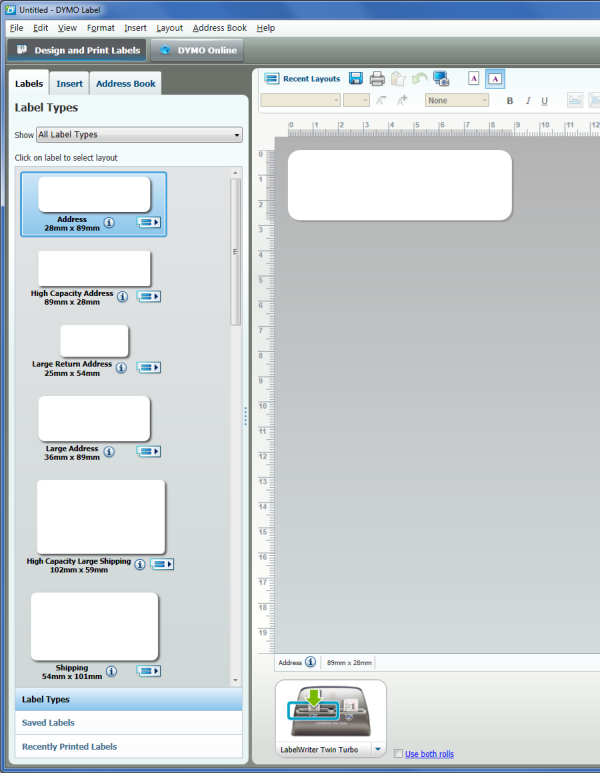
- Dymo Labelwriter Software - Label Tab
The currently selected label is in the design area on the right. You could start editing this, but we're going to choose a different size - so let's left click once on the Large Address Label (known as the 99012 Label). Up pops a window with a variety of built in templates.
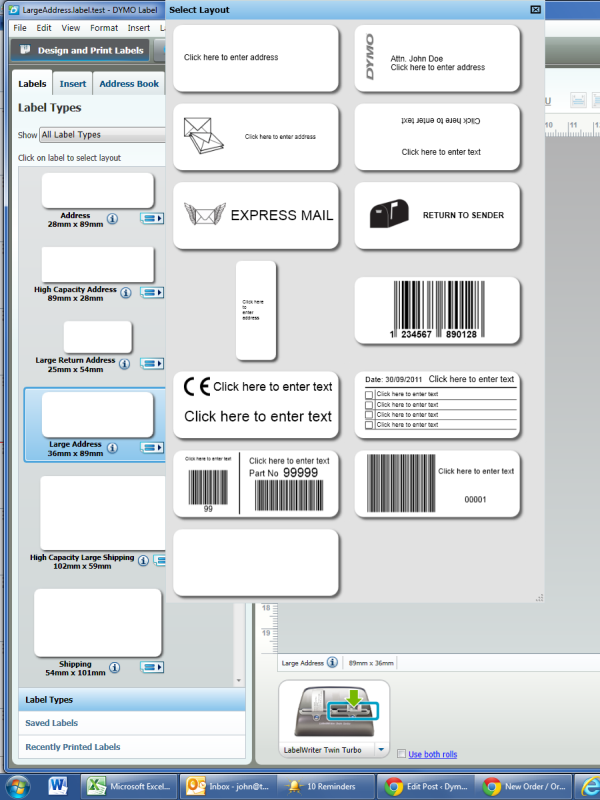
- Dymo Labelwriter Software - Select Layout
You can now choose one of these templates and simply change the text/barcodes/images as desired, or you can choose the blank one and create you label from scratch. We'll click the blank one for now - as you can see, as soon as you click it the selected label and template appears in the design area on the right.
First we want to add an area where the address will go, so click on the "Insert" tab in the top left. This reveals 2 new sections - the first is "Objects" which are things that can be added to the label such as a barcode, a graphic, a text box etc, the second is a selection of clip-art. To add either to the label just drag and drop!

- Dymo Labelwriter software - Insert Tab
So grab the "address box" object from the label objects (left click it and hold the mouse button down) and drag it across to the label in the design area and drop it on the label (let go of the mouse button). You can then use the mouse to resize and move the address box to cover the part of the label where you want the label to appear. I've left some space on the left because I want to add a logo...
Now grab the "image" object from the label objects window and drag it onto the label. An image properties box will automatically pop up for you to provide more information. I'm going to add an image from my computer so select file and press the browse button. I'll choose a funky logo image, select left alignment with middle vertical alignment, and keep the scale as proportional (this means that the image will retain it's shape as you resize it - so if you make it taller it will become wider automatically to retain it's proportions). Note this logo is in colour, but as the label printers are black and white this will be converted to greyscale on the printed label...
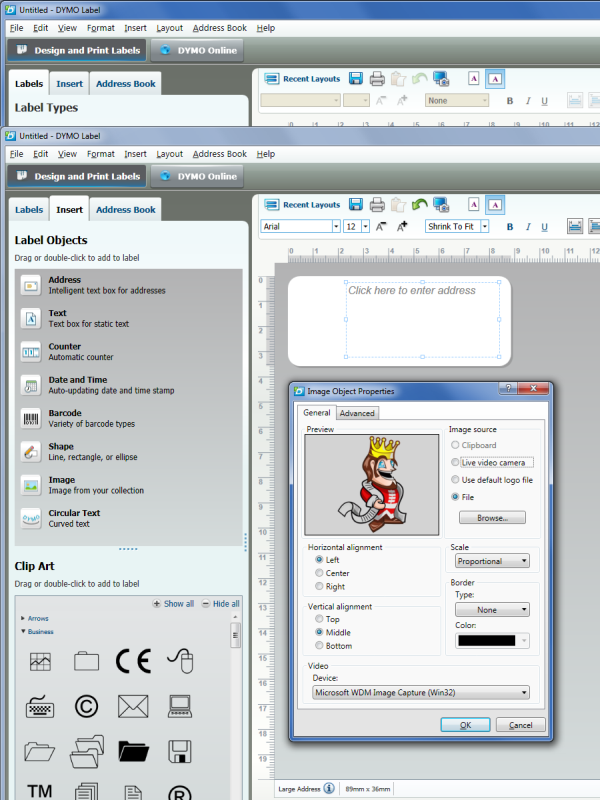
- Dymo Labelwriter Software - Image Object
Now I resize the image object, and make a few adjustments to the address box size so they don't overlap. Let's add a little marketing message as well - so squash the address box down a bit and drag over a text box. Then type in some marketing text, change the font style and size as appropriate and site back and admire our new label!

- Dymo LabelWriter Software - Finished Label
Now we want to save this for future use - go to the file menu and select "save as", and enter a descriptive name for it.
When you need to print this particular label all you have to do is go to the "labels tab", select "saved labels" near the bottom and then select it from the list. Once the label is chosen then you can enter the address in a number of ways:
- Click on the "Click here to enter address" and start typing the address
- Click on the "Click here to enter address" and paste the address onto the label from another application
- Click the address book tab, and select an address from the list
.jpg)
.jpg)

.jpg)